Quickstart Guide to Ajatix Maps & Directions Expression Web Add-in
Start the Ajatix Maps & Directions Expression Web Add-In
Place the cursor into the position on page where you want to insert the map. Start the Ajatix add-in by clicking the Maps & Directions icon ![]() in the Ajatix toolbar.
in the Ajatix toolbar.
Create a new Maps & Directions
Click OK in the Start Wizard to accept the default option to create a new map.

Ajatix Maps & Directions is fully customizable, you will be able to change the map style any time later.
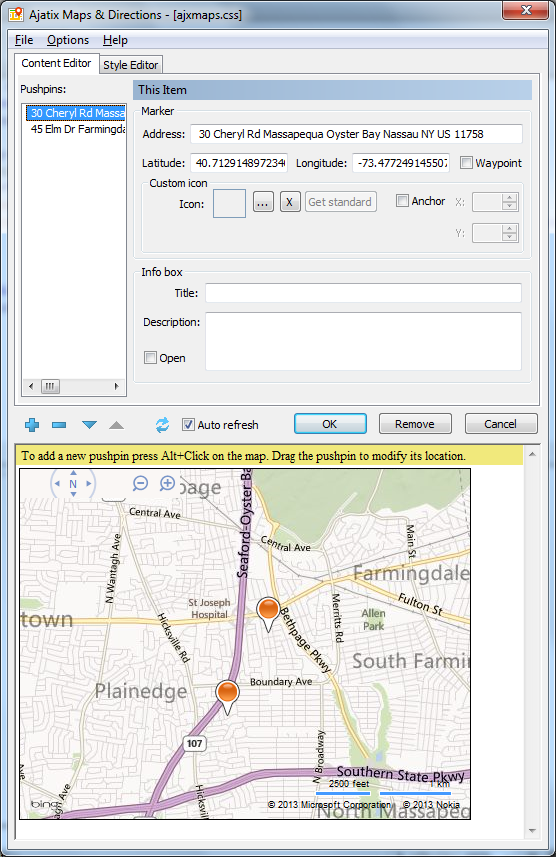
Populate the Maps & Directions
Your Maps & Directions can be used to display a map with way points or markers on it. Add markers (pushpins) to the map by clicking the Add icon ![]() or alt-clicking on the map. You can specify an exact address and (or) latitude and longitude and, optionally, a title, a description and check on "Waypoint" if you want to route through this point for each entry. When specifying the location by alt-clicking the map, the address, latitude, and longitude are getting filled in automatically. You can change the address and coordinates by dragging the marker to a new location on the map.
or alt-clicking on the map. You can specify an exact address and (or) latitude and longitude and, optionally, a title, a description and check on "Waypoint" if you want to route through this point for each entry. When specifying the location by alt-clicking the map, the address, latitude, and longitude are getting filled in automatically. You can change the address and coordinates by dragging the marker to a new location on the map.
Customize the Maps & Directions style
Customize your map design using the Style Editor by changing the map and directions options.
Note: You will need your own Bing Maps Key in order to work with Bing Maps. If you do not have the key, you can get one from Microsoft.
Preview the map
The live preview window allows you to see what the map will look like as you edit it. Any change in style or content will be reflected in the preview window in 5 seconds. You can force the refresh of the preview window by clicking the refresh icon ![]() . You can turn off the auto refresh by unchecking the Auto Refresh box.
. You can turn off the auto refresh by unchecking the Auto Refresh box.
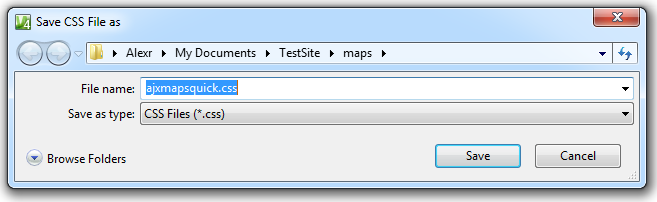
Save the Maps & Directions
Save the Maps & Directions style into a CSS file by selecting the Save command in the File menu. Alongside with the CSS file the add-in will generate and save a JavaScript file (.js) and a project file (.ajm).

Select the location and the name of the CSS file and click the Save button.
Click OK to finish editing and close the add-in.
The add-in will insert the markup into the page.

Editing the Maps & Directions
The following topics will help you to learn how to customize your Maps & Directions: