Quickstart Guide to Ajatix Email Spam Blocker Dreamweaver Extension
Start the Ajatix Email Spam Blocker Dreamweaver Extension
Place the cursor into the position on the page where you want to insert a new email, or leave the cursor in any arbitrary position if you are not going to add a new email address. Start the extension
by clicking the Email Spam Blocker icon ![]() in the Ajatix
group of the Insert panel. All the email addresses found on the page will be loaded into the extension.
in the Ajatix
group of the Insert panel. All the email addresses found on the page will be loaded into the extension.
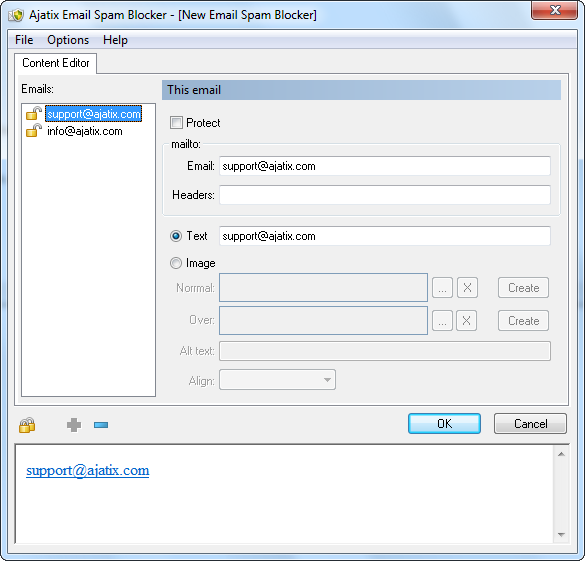
Protected email addresses are marked by ![]() icon, non-protected ones are marked by
icon, non-protected ones are marked by ![]() icon.
icon.
You can protect all email addresses on the page by clicking the Protect All Emails icon ![]() .
.
Adding a new protected email.
Select the email you would like to edit from the list. See Editing Email Content to learn how to edit the email.
Preview
The live preview allows to see how the selected email will look like in the end user's browser.
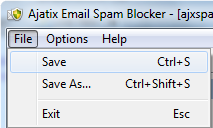
Save emails.
Click OK button or select Save command in the File Menu.
You will be prompted to select a name for the CSS file. 'ajxspamblocker.css' will be suggested by default.
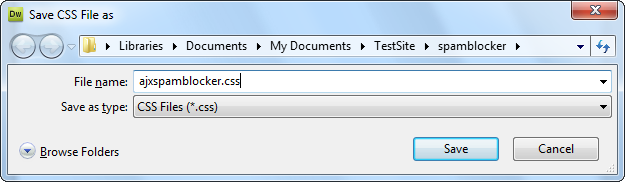
Select the location and name of the CSS file and click the Save button. Alongside with the CSS file the extension will generate and save a JavaScript file (.js).
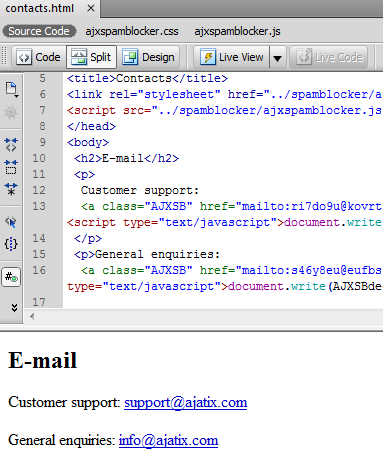
The extension will insert the markup into the page.
Protecting email addresses on other pages.
Open the desired page in Dreamweaver. Run the Email Spam Blocker extension as described above. Make all necessary changes and save your work. You will be prompted to save into the same CSS file as the last time. Leave the suggested CSS file name intact in order for all the pages of your site to share a single CSS and a single JavaScript file for all protected emails.
The following topic will help you to learn how to edit your emails: