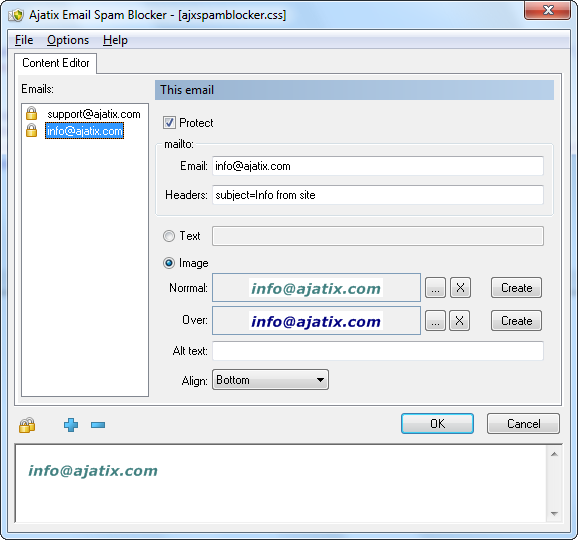
Editing email content

Content editor allows to add a new email, delete an existing email, or edit an email.
Adding and deleting emails.

Use Add New Email, Delete Email buttons under the list of emails to add a new email to the list and to delete emails. You can add only one email per session.
Editing email.
Select the email you would like to edit from the list.
Protect
Specifies whether the selected email is protected from spam bots or not. Check the box to protect the email address from being collected by spam bots.
Specifies the email address.
Headers
Optional. One or more name-value pairs. The pairs should be separated by a "&" The name can be one of the following strings.
- subject
- Text to appear in the subject line of the message.
- body
- Text to appear in the body of the message.
- CC
- Addresses to be included in the "cc" (carbon copy) section of the message.
- BCC
- Addresses to be included in the "bcc" (blind carbon copy) section of the message.
An email address on a web page can be displayed as a text or as an image.
To display email as a text: select the Text option and enter the desired text.
To display email as an image: select Image option.
Normal
Image for the normal state (mouse off) of email.
Over
Image for the mouseover state of email.
Alt text
Alternative text for the image.
Align
Sets the alignment of the image relative to the content around it.
Images can be loaded from drive or generated from text. To load an existing image, click ![]() button and select the desired image.
button and select the desired image.
You can generate an image by clicking the Create button. Image generator options are described in the Create Image section of the manual.
All images are saved into <CSSFileName>_files folder under ajxsbimg<N>.<ext> names, where <N> is a number and <ext> is a file extension.
You can protect all email addresses on the page at once by clicking the Protect All Emails icon ![]() .
.